Use eCommerce Tracking to Send a Purchase Event
Google Analytics can track eCommerce websites for you.
ECommerce events on Google Analytics and Google Tag Manager are audited and you can find the data under Analytics → Reporting → Monetization → E-commerce purchases.

Under this section, you can review all the conversions and purchase activity that has occurred on your website.
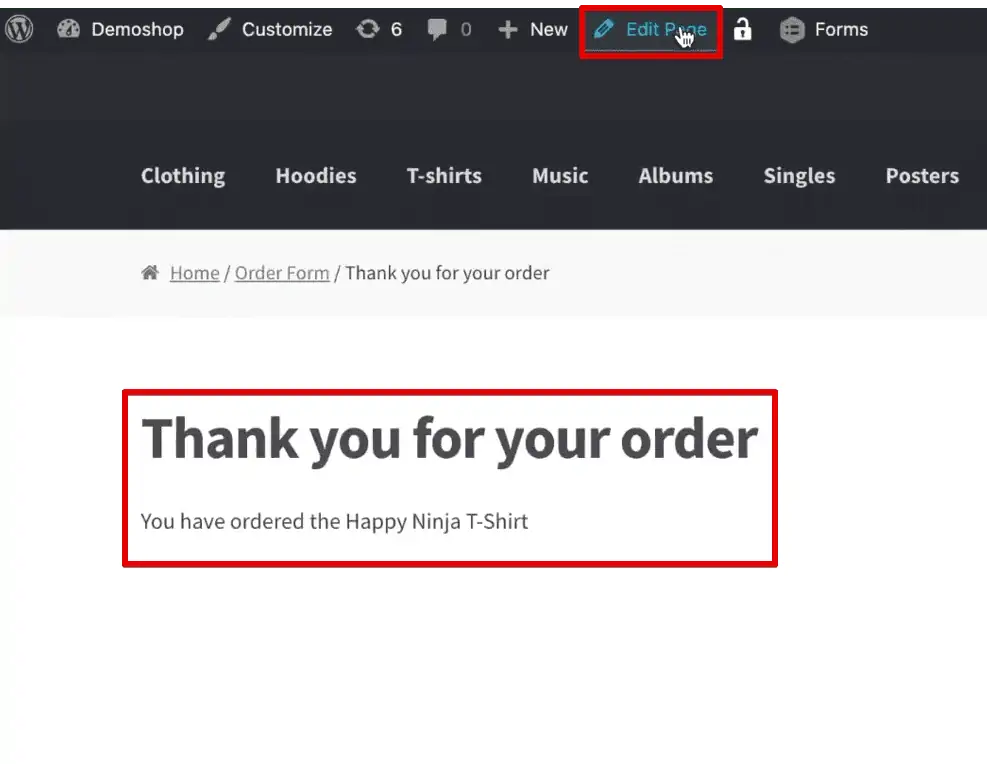
At our end, we have a demo Order Form and a summary of an order for a product worth $11.99. Clicking on Submit gives us the Thank You page.

For an eCommerce conversion to occur in our Google Analytics, we need to set up a data layer at the GTM, so that specialized data about the purchase can be recorded and reported.
The data layer provides your GTM and GA4 with the data in the background for the tools to analyze and report to you through the screen.
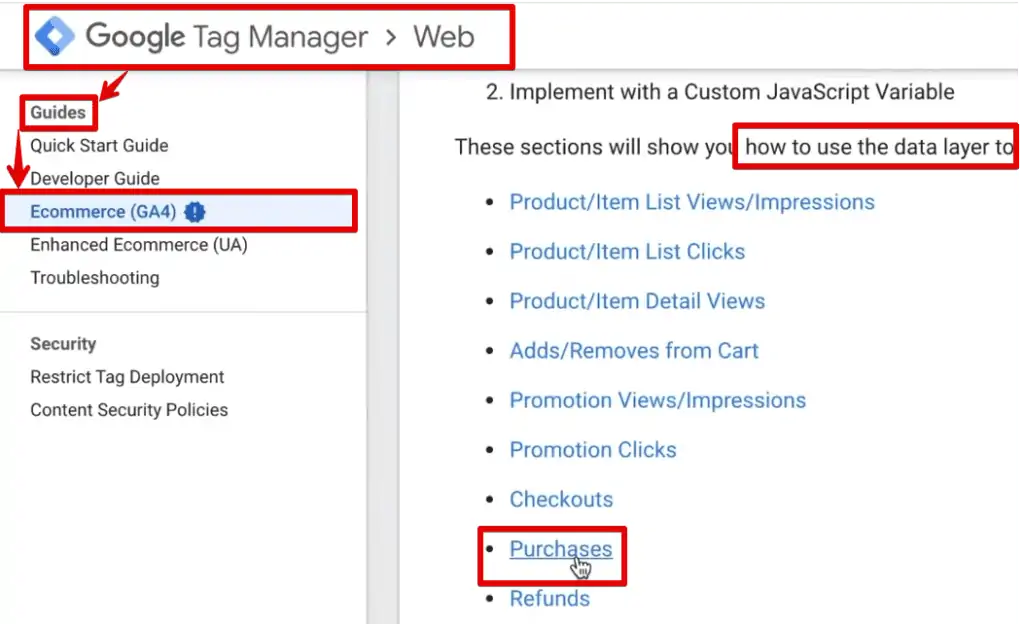
Google Analytics4’s documentation on setting your data layer is a code so that the data can be recorded in the background. Google Analysis provides more to eCommerce tracking than just tracking purchases.

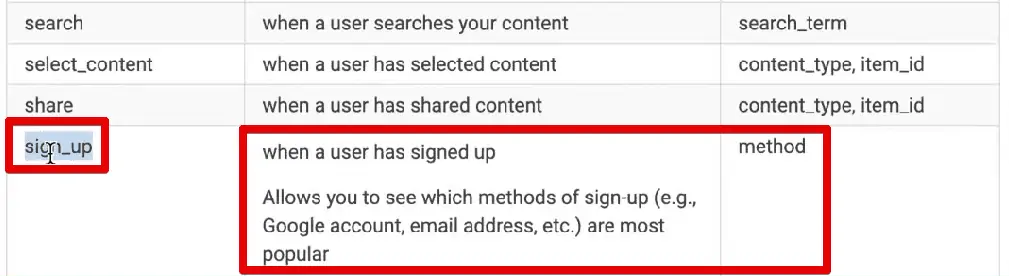
The recommended events section has a predetermined event called sign_up and it will trigger when someone signs up on a form. The parameter for this trigger is method.
For this demo guide, we’re going to stick to tracking purchases. This code would need to be deployed on your website on the thank you page, for Google Tag Manager to have that data available, and then send it on to Google Analytics 4.
If your eCommerce shop is on Woocommerce, Shopify, or such eCommerce stores, you might find a plug-in available for you. Having a plug-in can save the time and hassle of entering the code into your GTM and GA4. It can directly send over the data to your GTM and GA4.
To try this out, let’s head to our Demoshop’s thank You page and edit the code.
We’ve already got our code snippet into the code editor, and we’ll save it.

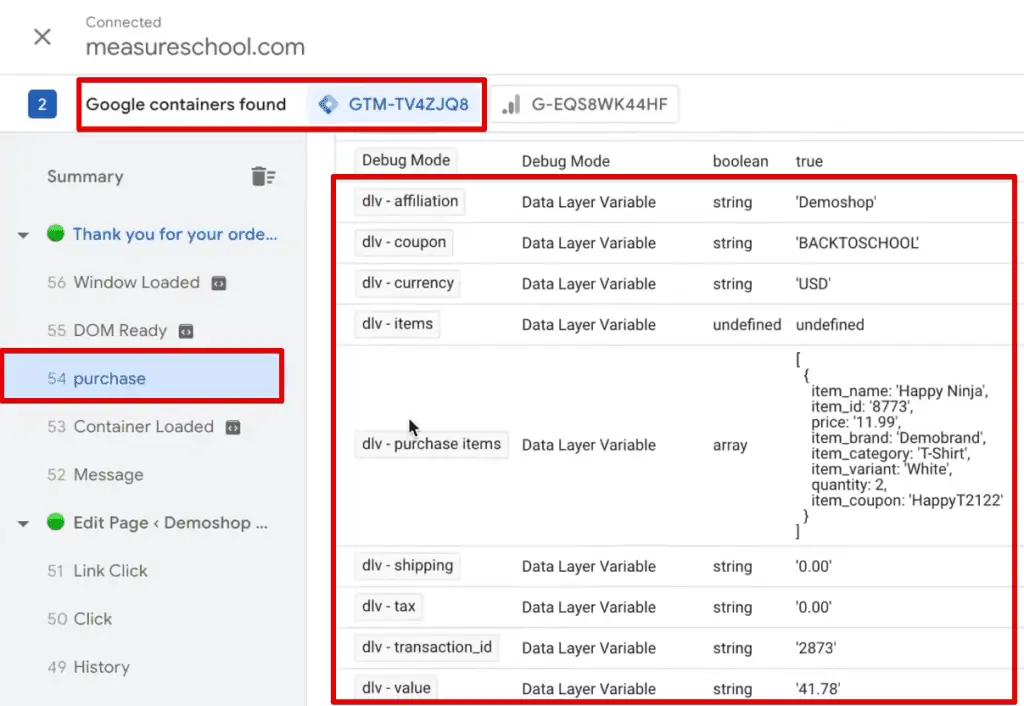
Heading to the Tag Assistant, you’ll be able to find the code in the data layer.
Go over to the purchase → Data Layer. The data layer is set up. This information is ready and can be sent to Google Analytics 4. The event key in predetermined events at Google Tag Manager for eCommerce sites is ‘purchase‘.

You need to follow the syntax to ensure proper formatting. In GTM, you’ll have to first build a custom trigger.
It is built such that it will fire only after the page loads. Giving it time to load the data about the order on the data layer, and then fire.
The trigger is named custom – purchase. Choose the trigger type as Custom Event and the Event name purchase. You can choose to set it to All Custom Events because we don’t need to narrow our report.

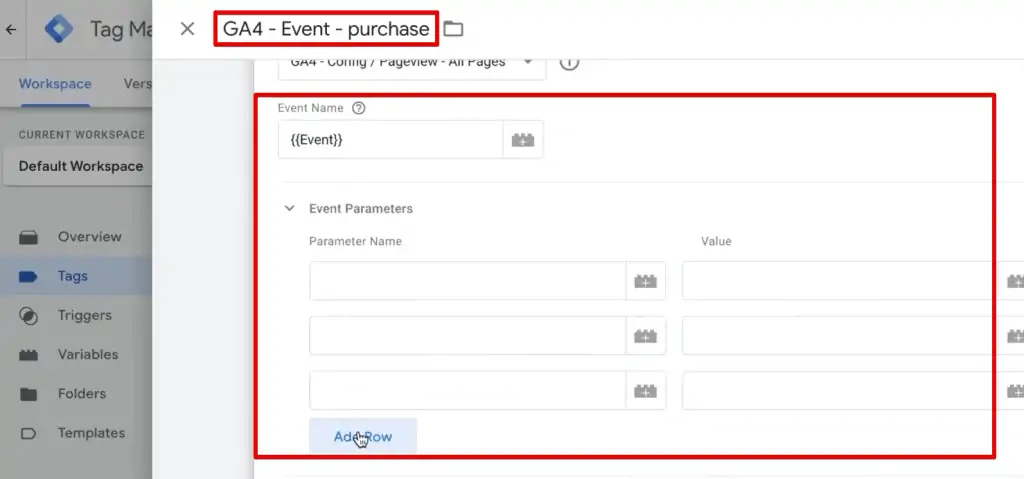
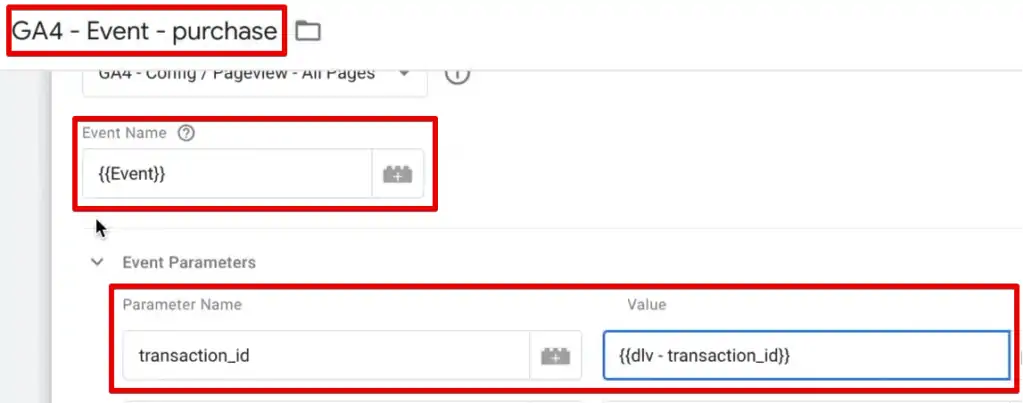
After all this, we’ll create a Google Analytics 4 tag. Name it GA4 – Event – purchase.
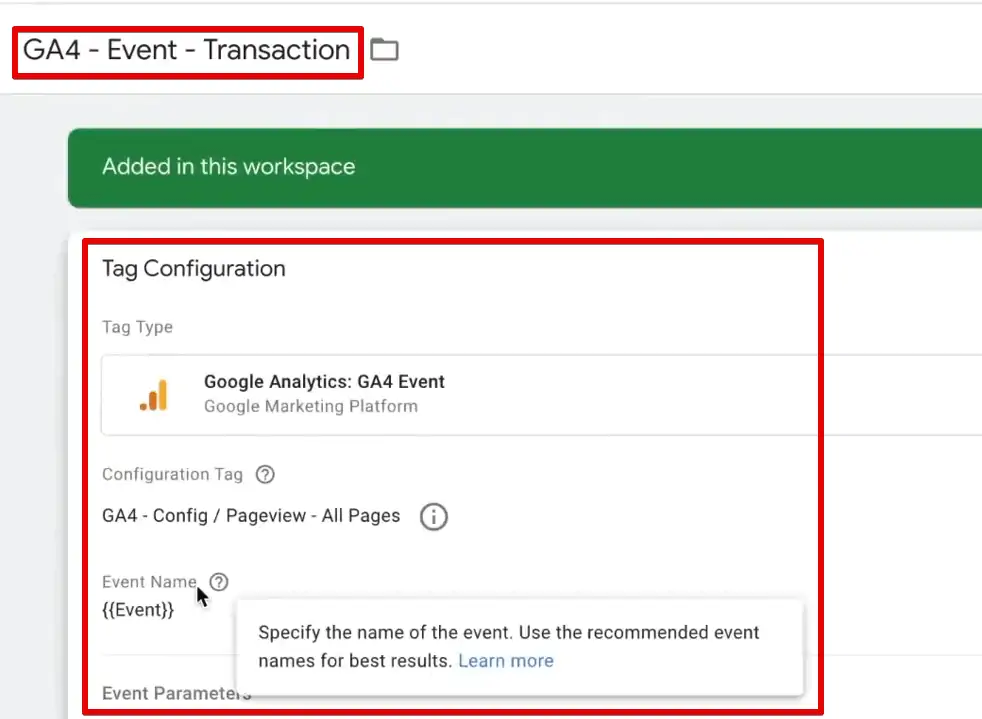
This is an event tag, so make sure you choose the Google Analytics: GA4 Event, from the list of tags presented to you.

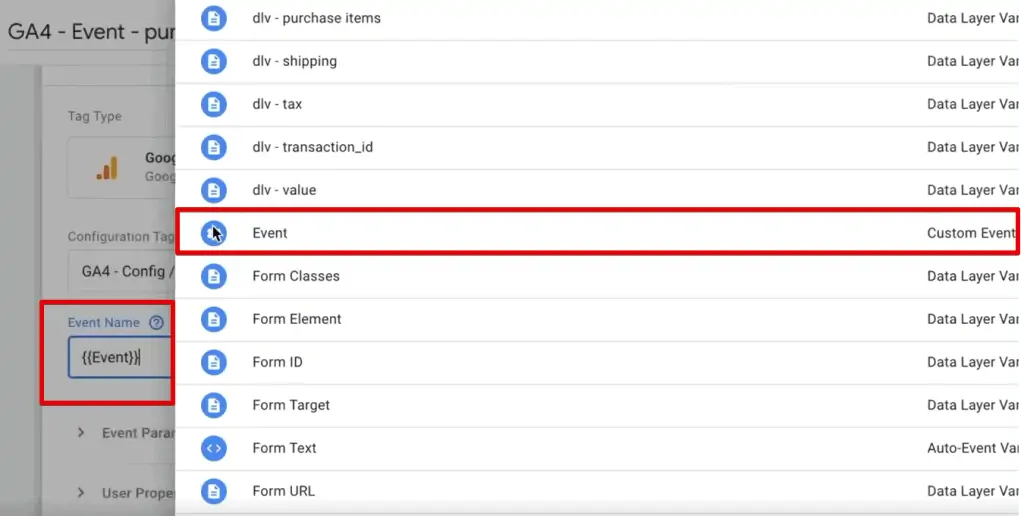
We will proceed to connect to the Configuration tag followed by the Event Name. Don’t forget that the Event Name is equal as per the documentation, in this instance, it’s {{Event}}.
Next, we need to add the Event Parameters. We want to add everything we want to measure from the purchase. Here, we’ll enter all the parameters from hierarchy 1.
The parameters we’ve applied are as follows:
- transaction-id
- Affiliation
- value
- tax
- shipping
- currency
- coupon
- items

To pull the information from the data layer, you need to set up data layer variables. Let’s try setting up the variable for transaction ID.
Back at our tag, we enter the Parameter Name as transaction_id and the value/data layer variable is customized by generating a new variable.
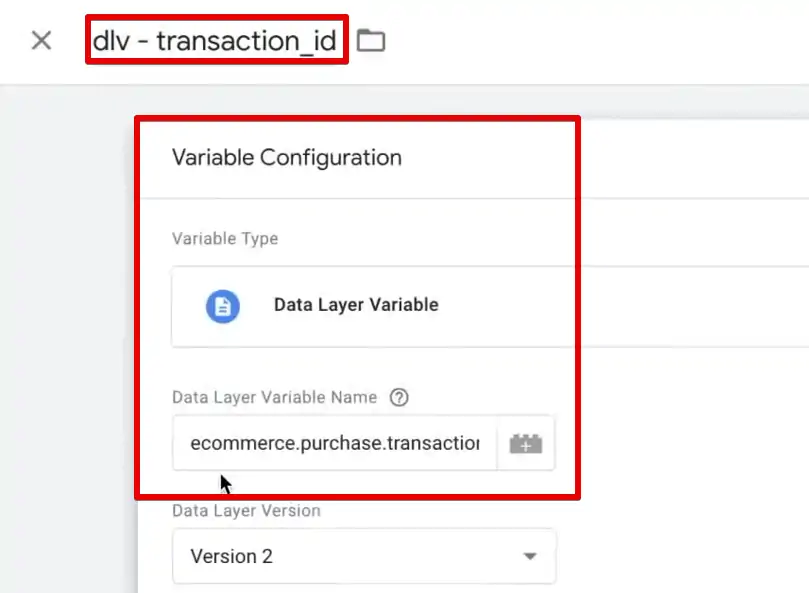
The variable is called dlv – transaction_id. Remember to save the Variable Type as Data Layer Variable.
Your Data Layer Variable Name has to follow the same path as the code. In this instance, its ecommerce.purchase.transaction_id.
Once you’ve set it up for your transaction ID, you’ll have to follow the same for the other variables and ensure the tag is complete. Having completed this, save and you’ll be ready to send data to Google Tag Manager.
Once you’re done, pull a quick review of the tag settings and connect it to the custom trigger that you just created. Once done and saved, you can test this by hitting the preview button.

To test our exercise, we head back to Demoshop and go to the Order Form. We’ll click on Submit and this time the Google Tag Assistant will record the tag being fired.

You can take a look at the event from the Google Tag Assistant and find more details about the event.
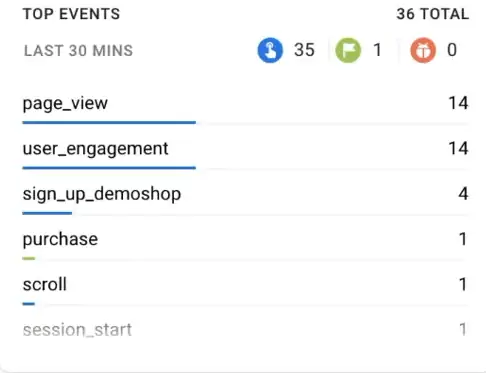
Meanwhile, in the Google Analytics 4 DebugView, we can observe the key events that have taken place on our website. Notice that the purchase done is marked as a conversion.

You can pull up more data about the purchase as you click on the event. This opens up a new window with Parameters, User Properties, and Items.
Under Items, you will be able to see the data layer parameters – coupon, currency, item, etc.

🚨 Note: Purchase events are by default marked for conversion at Google Analytics.
This is the third way of creating a conversion inside of Google Analytics 4 with the help of Google Tag Manager and the data layer which you need to implement.
So, there we go! Those are the 3 ways of setting up your GA4 conversion tracking!