Set Up WordPress Google Tag Manager in 3 Steps
To add Google Tag Manager to WordPress, just follow these steps to get started.
Step 1: Create Your Google Tag Manager Account
First of all, you need to visit the Google Tag Manager website and then click the Sign-Up button.

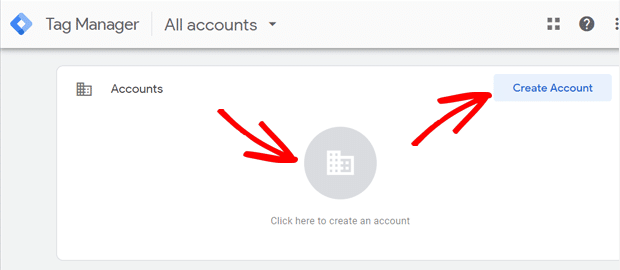
Next, you need to sign in with your Google account. Once done, you can see the Google Tag Manager’s Create Account page. Click on the ‘Create Account’ button to get started.
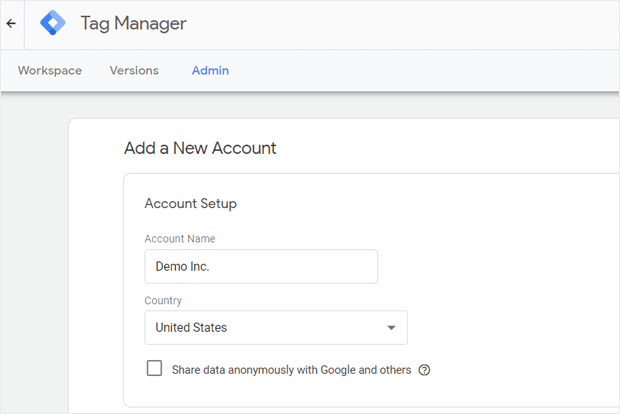
On the next screen, you can add a new account. Enter your account name and choose a country in the Account Setup box. You can use your company name as your account name.
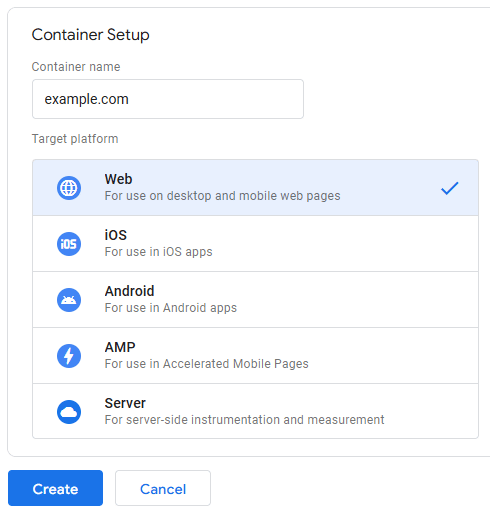
Next, you need to set up your container. A container is the collection of tags, triggers, and all configurations installed on a website.
You can enter your website name as your container name. Choose Web under the Target platform container option, and then click on the Create button.
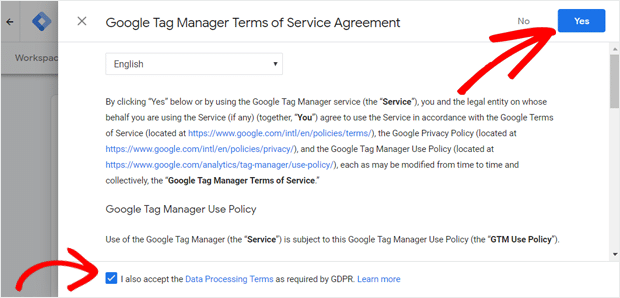
Now, you’ll need to accept the Google Tag Manager Terms of Service Agreement to proceed. Check the box next to ‘I accept the Data Processing Terms as required by GDPR.’ at the bottom, and then click the ‘Yes’ button on the top right corner.
If you want to learn more about GDPR, go through our guide on GDPR and Google Analytics.
Upon accepting the terms of service, you’ll see a new popup window appear on the screen with code snippets to install Google Tag Manager on your website.
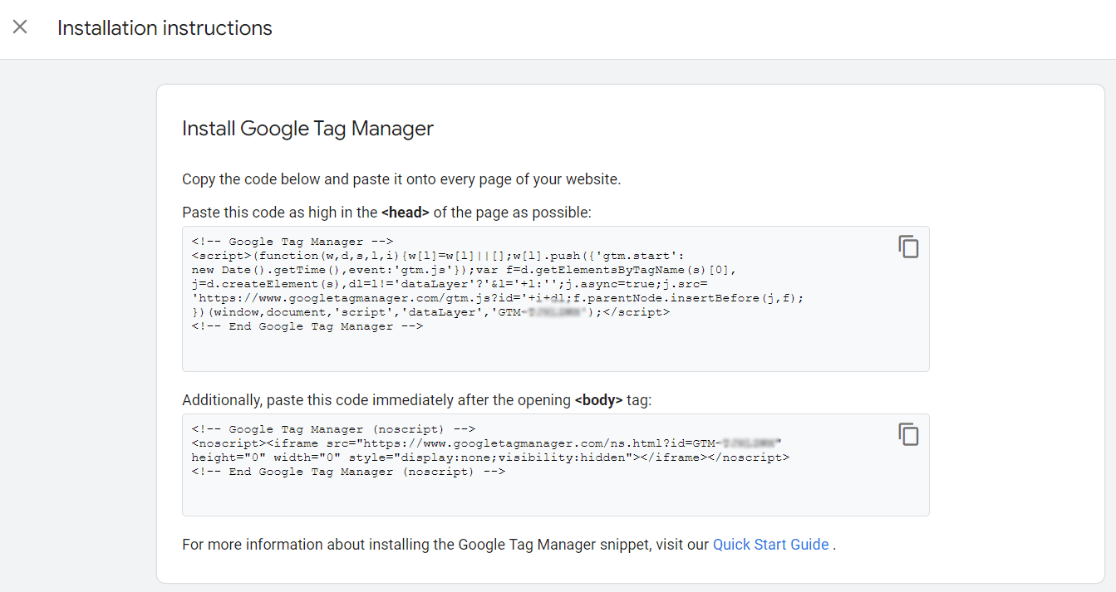
These two code snippets need to be added to the header (inside <head> tag) and in the <body> section on all of your webpages.
Step 2: Add Google Tag Manager Code to WordPress
Login to your WordPress dashboard and then install the WPCode plugin. Upon activation, go to Code Snippets » Header & Footer page.
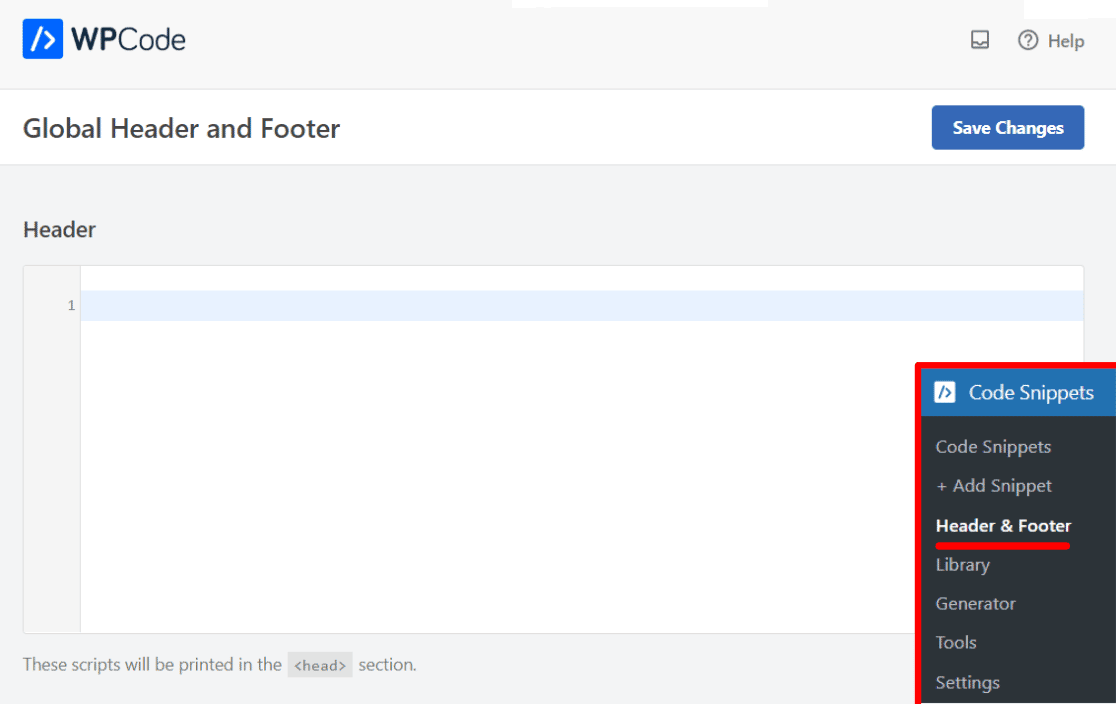
Now, you can see a box for adding code to your header. Go back to your Google Tag Manager account and copy the code in the first box. Paste the code into the Header box.
Let’s go over two methods you can use to add Google Tag Manager to your WordPress website in this post.
An overview of what we’ll cover:
- Create a Google Tag Manager Account
- Implement Google Tag Manager Code Snippet on to Your Website
- Check if GTM is Installed Correctly
Step #1: Create a Google Tag Manager Account
Since you are here, you probably have an account, but if don’t have an account yet, go here to set one up.

Step #2: Implement Google Tag Manager Code Snippet on to Your Website
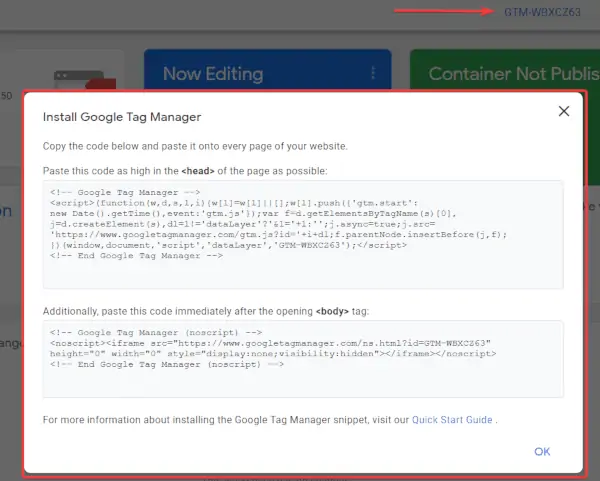
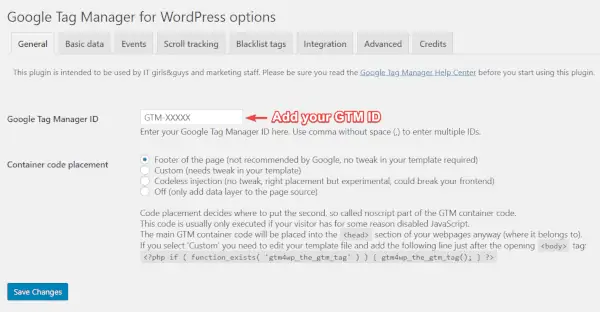
If you need to go back to get the scripts just click on Google Tag Manager ID which you can find on the top right corner. After you click on it a window will pop-up.
Now, adding the scripts to a WordPress website can be done by using a plugin or by editing the theme files.
But there is a catch:
The way WordPress works is that you need access to edit files or install a plugin. Make sure this is something that you can do before going forward.
First Method: Use a Plugin
Content management systems like WordPress have the availability to extend their functionality by installing plugins.
One that I can recommend is the Google Tag Manager for WordPress by Tamas Geiger.
Installing it is very easy:
- Log into your WordPress admin panel.
- Go to Plugins / Add new.
- Search for “Google Tag Manager.”
- Click on “Install now” in the search results next to “DuracellTomi’s Google Tag Manager for WordPress.”
- Now, go to Settings / Google Tag Manager and enter your GTM container ID.
Even if the plugin is a safer route, know the following about this method.
The <head> script is added correctly to your website because it is critical to enable all features of GTM. The <body> script is an iframe snippet that acts as a fallback for users with JavaScript disabled. Because WordPress doesn’t have a hook to place custom code under the body tag, by default it is placed in the footer.
This is not ideal because it reduces the likelihood of the tag firing. It will still work, but only after the page fully loads.
If your setup requires you to definitely need the <body> script to be added in the respective tag, you can choose the custom injection method. This plugin uses a workaround, so to be sure everything still functions ok on your site, make sure you test and see if your website is still working as expected using a few different browsers.
A great thing about using this plugin is that it comes with multiple dataLayer integrations usually available through customization.
For example, in the Basic tab, we can send the post date, author name or post title to the dataLayer. We can take these data points and transfer them to our analytics tool.
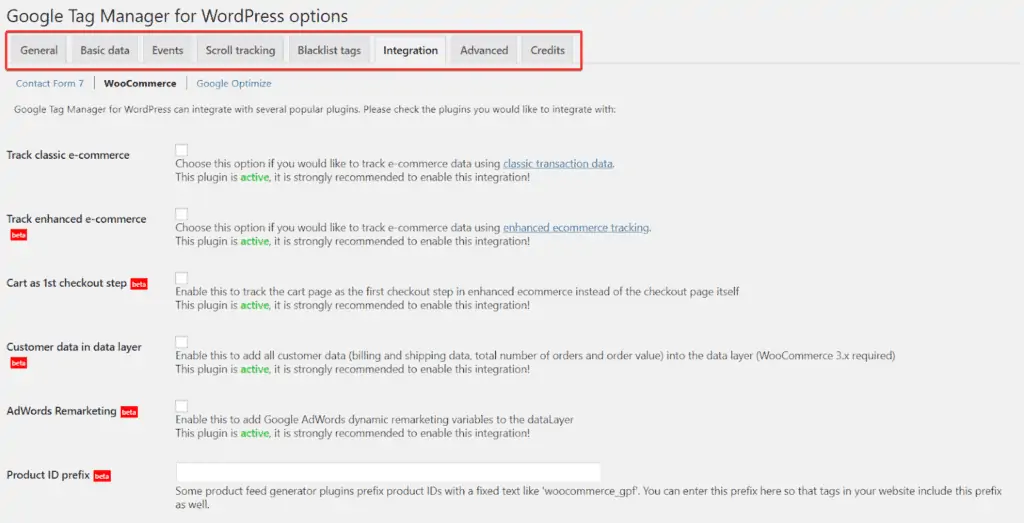
The Integration tab is something you probably need to check if you are using plugins such as ContactForm 7 or WooCommerce. It is handy if you want to utilize Google Analytics Enhanced E-Commerce Tracking capabilities because you don’t have to implement the dataLayer yourself.
Also, the plugin can inject the Google Optimize Page Hiding Snippet to make your experiments run smoothly.
Second Method: Edit the Theme Files to Install Tag Manager
It’s best practice to have a child theme for whatever customization you want to do to your theme. Like adding the GTM container code. You don’t want the changes to be overwritten when a new update becomes available for your parent theme. Usually editing the theme’s files is something that you should avoid. Talk to your website developer to choose the best method.
Here is what you need to do (or what a developer would do): Within WordPress, you can log into your dashboard, then go to Appearance.
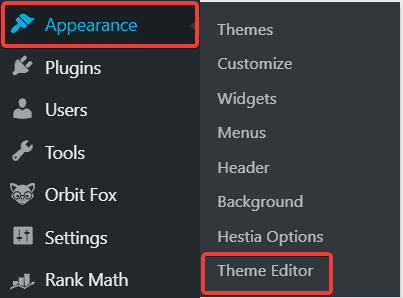
Under Theme Editor, you should have access to the theme files itself.
Note: It is recommended that you create and only edit something called a Child Theme in your Wordpress website. For more guidance on what a Child Theme is and if you should use it, check out this guide.
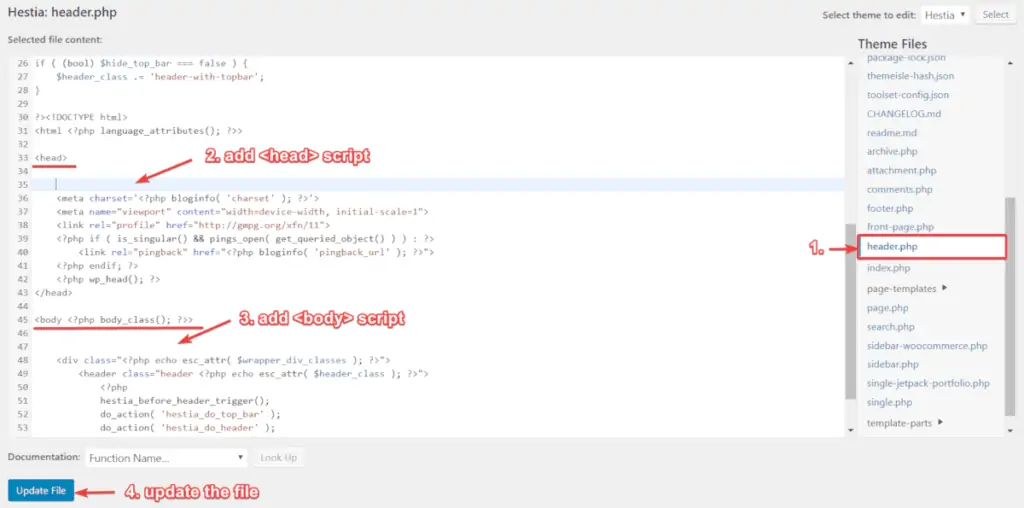
After that, look for the theme header.php file and click on it. Here you will find the head tag and the body tag. Let’s copy the first part of the code and place it beneath the opening head tag. The second script part needs to go beneath the opening body tag.
Finally, click Update File.
Step #3: Check if GTM is Installed Correctly
There are a few ways to check that you have set GTM up correctly. Here are a few:
1. Check using the build-in GTM Preview and Debug Mode
Go into your Google Tag Manager account and click on the Preview button.
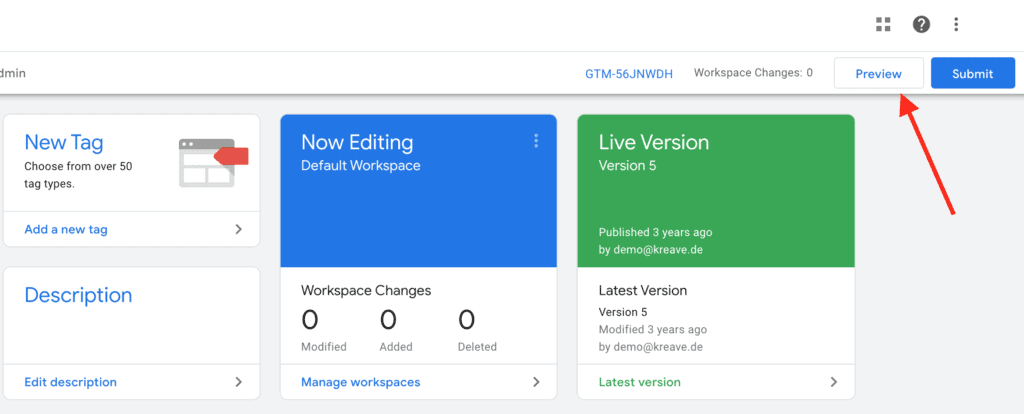
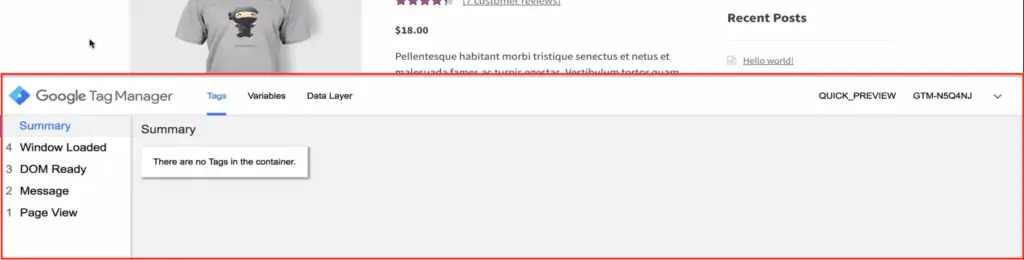
Tag Manager will have now put only your browser (not your customers) into a special state where, when viewing your website pages, you see a little dashboard pop up from the bottom of your screen.
So go over to your website and refresh the page to see if this indeed happens. If so, then you have installed GTM correctly. Check a few pages just to make sure.
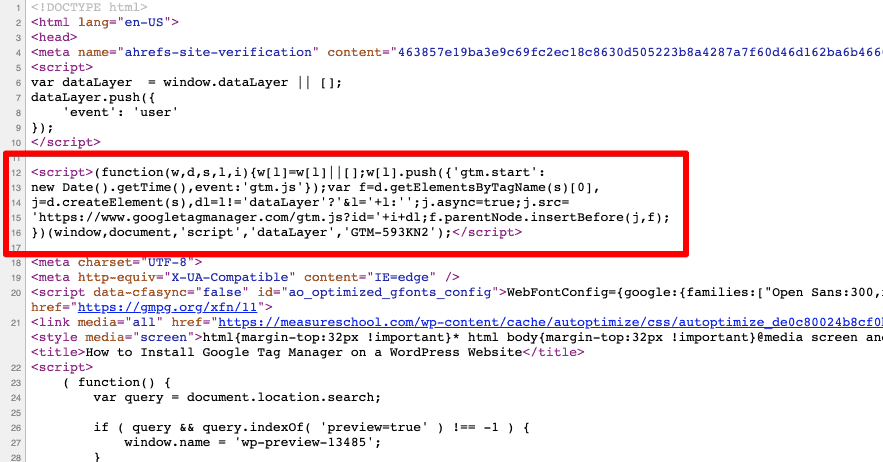
2. Check Your Website’s Source Code
Go to your website and look into your page source to see if the scripts are now placed in the head section of our HTML and beneath the opening body tag.
To do this, right-click and look for the View page source option. Now you could go through other pages and check whether it’s installed in the HTML, but we can also help ourselves with some tools.
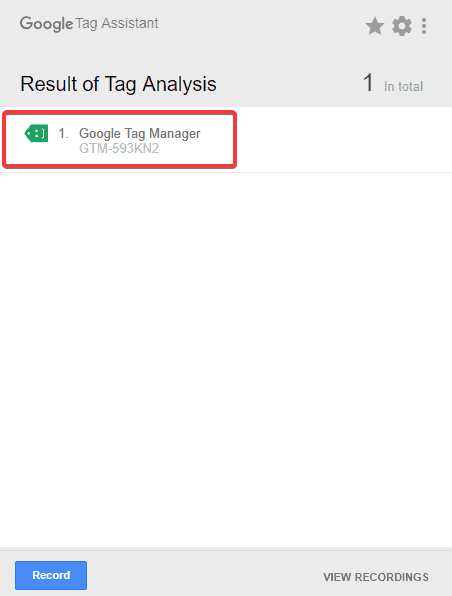
3. Check with the Google Tag Assistant Extension
The last way is with the tool, Google Tag Assistant. After you install it on your browser, click on the icon to open it. You should see that Google Tag Manager is installed.