Create a Custom Event with GTM
Welcome to method number two. This time, we use a little bit of Google Tag Manager magic. Let’s get started!
Considering that we want to record the success of a sign-up form from our Demoshop, we’re going to create a trigger and a tag, connect it to our web page and let Analytics take care of recording the data for us.

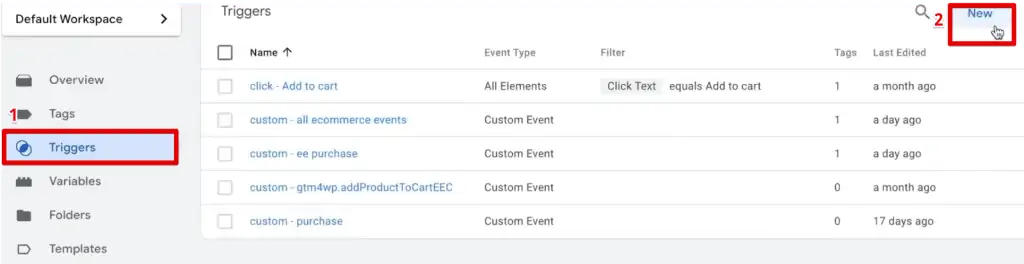
To start, head over to the GTM workspace and click on New to create a generic formSubmit trigger.
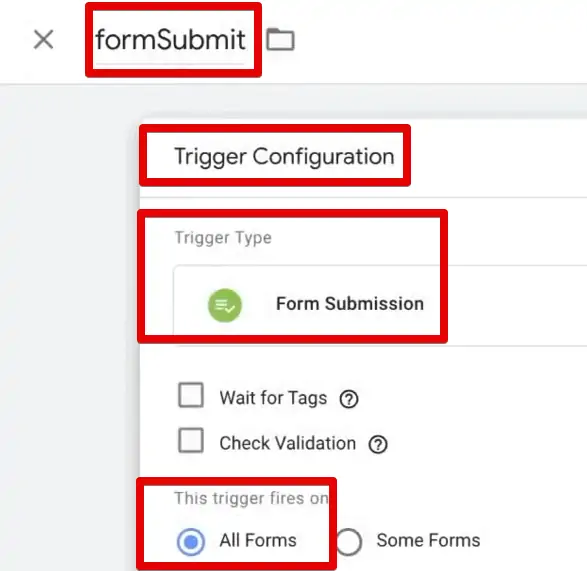
We’ve named it ‘formSubmit’ for easy identification and have set the trigger type to Form Submission.
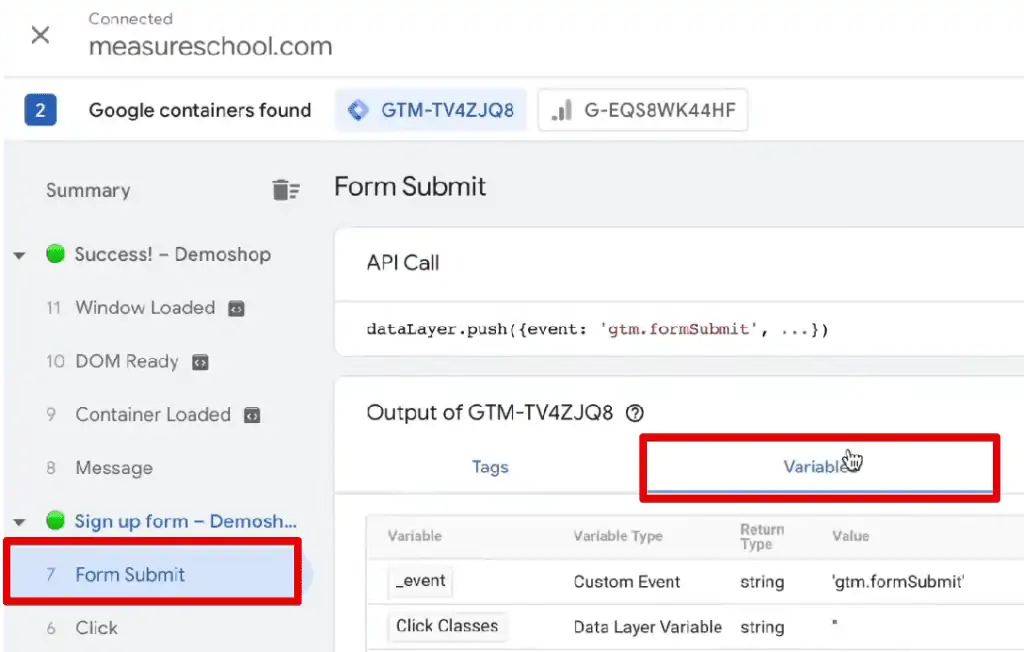
Save the trigger created. Let’s test this by going over to Demoshop and signing up on another form. This time, after submitting the form, you can see the trigger being fired on Google Tag Manager.
To ensure that your trigger doesn’t fire at any other event, you can refine your trigger settings. For this, go through the variables of the formSubmit to narrow it down.

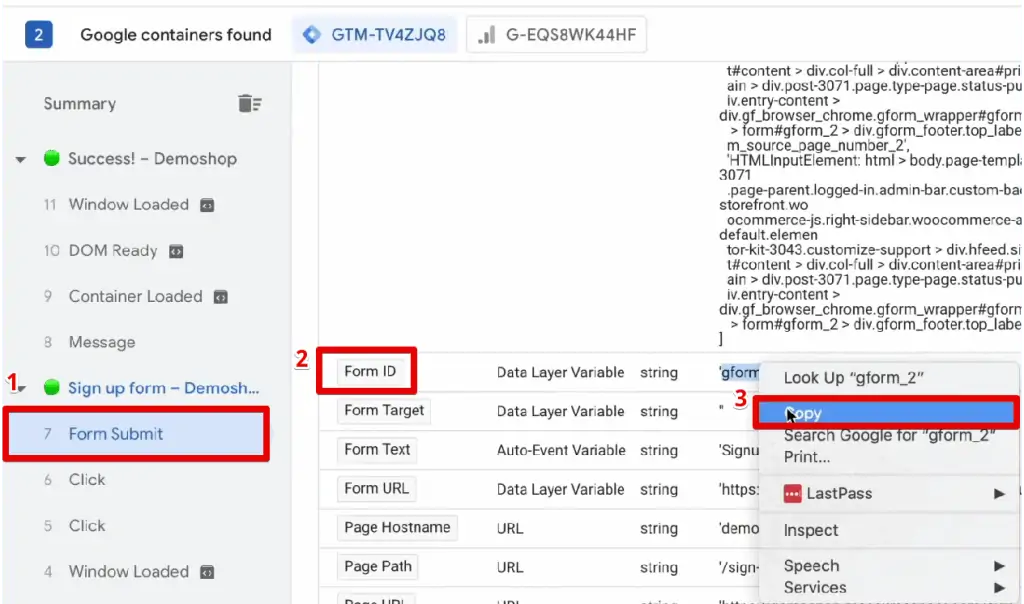
Find the Form ID & copy it. You can head over to the Manager Assistant and check out the variables.
Scroll down and you’ll be able to find the FormID. For us, it’s ‘gform2’.
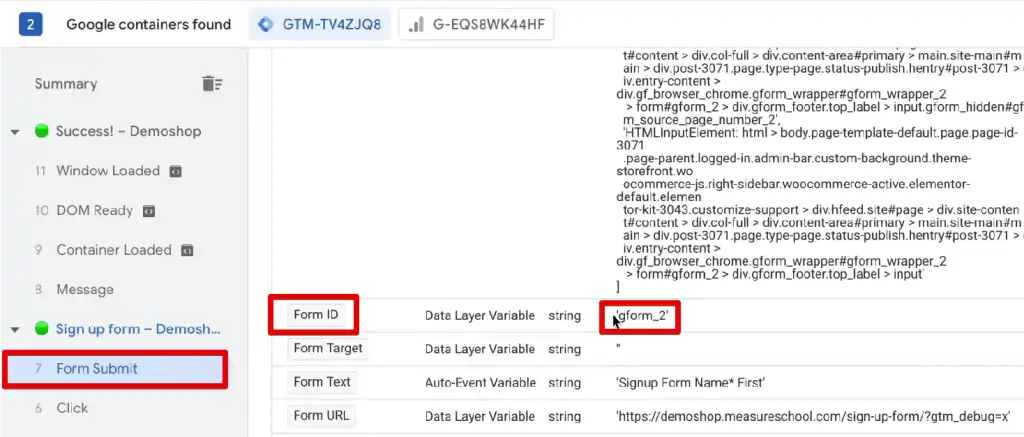
Here, our Form ID is ‘gform2’. We copy this ID and head over to the triggers settings. Note that we’ve established conditions for the trigger to fire only when Click ID equals gform2.
Go to the trigger that you created, select the ‘Some Forms’ option, and specify the condition when the trigger is to be fired.
🚨 Note: If you don’t have a Form ID variable, you can always choose another variable from the list to refine your trigger.
We will rename this trigger to formSubmit – sign up, because, now, this trigger will fire only after the sign-up form has been submitted.
In addition, you can select the Wait for Tags option if the user is redirected to another page. Selecting this option ensures you are giving Google Analytics enough time to record the event when the page loads and fires the trigger.
Moreover, you can state the conditions when you want it to be fired. We have set the conditions such that the trigger will be fired if the ‘Page URL matches RegEx.*.

Now that the trigger is set up and ready, we’ll go ahead and connect it to an event tag.
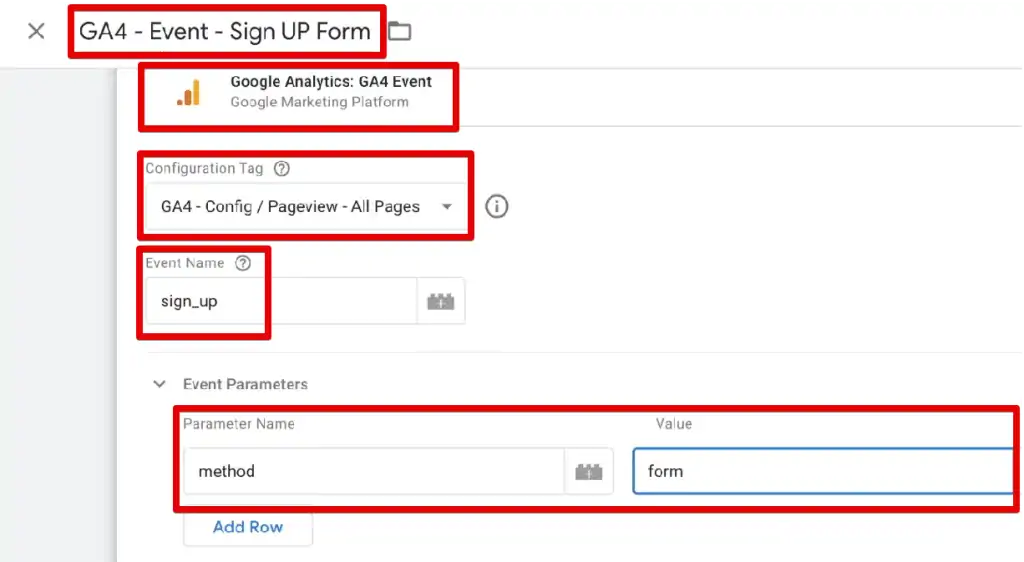
To create a new tag, hover over the plus sign, choose tag type as Google Analytics: GA4 Event, and Configuration Tag as GA4 – Config / Pageview – All Pages.
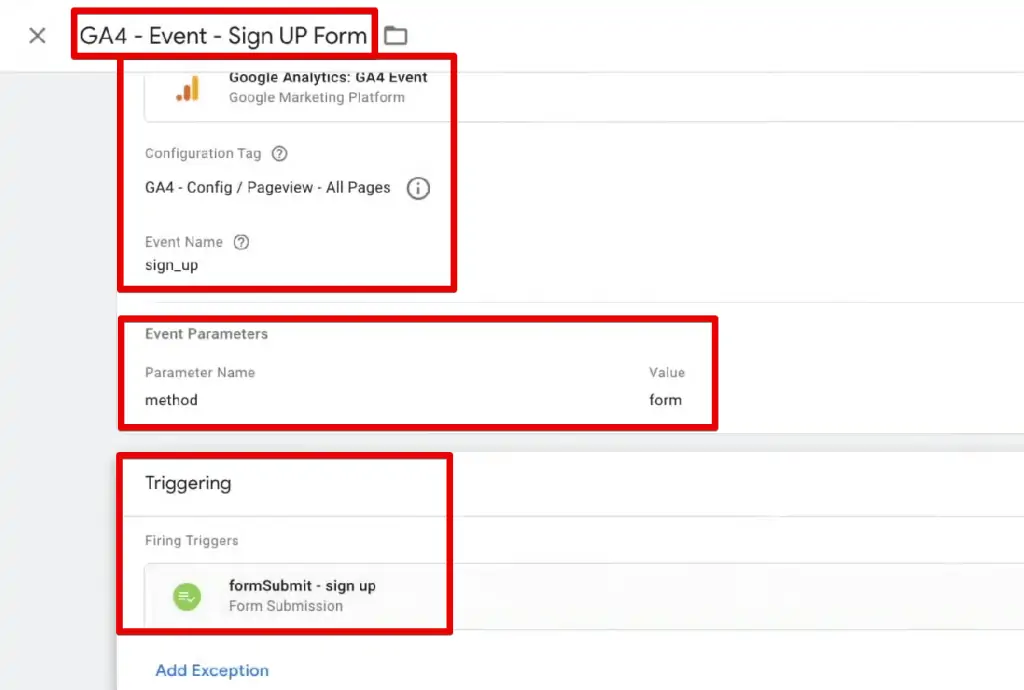
We’ve named it GA4 – Event – Sign UP Form.
Now, we will go to Event Name and Event Parameters. You are free to choose any event name or event parameter, but there are some predefined parameters from Google Analytics.
Moving forward, we’re using the predetermined parameter called method that is specific for Sign Up events. Back at our Google Tag Manager, we input the Parameter Name as method and the Value as form.
Don’t forget to scroll down and connect the formSubmit – sign up trigger to the GA4 – Event – Sign UP Form tag.
Click on Save.
After all this, we reach the Demoshop page again and submit another Sign-up form. This time, after submitting, we can now go to Google Analytics DebugView and analyze the events that have occurred on our website.
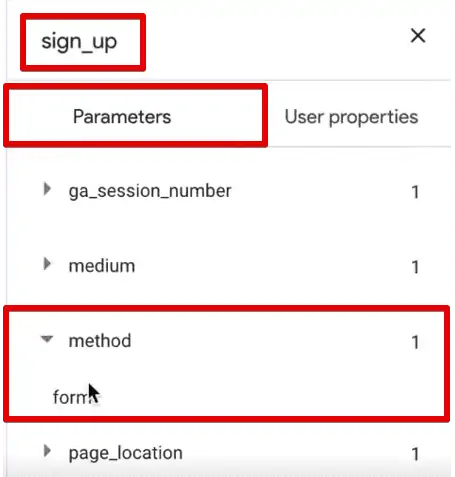
We notice the sign_up_demoshop has fired and a few moments later, the sign_up event shows up on the timeline.
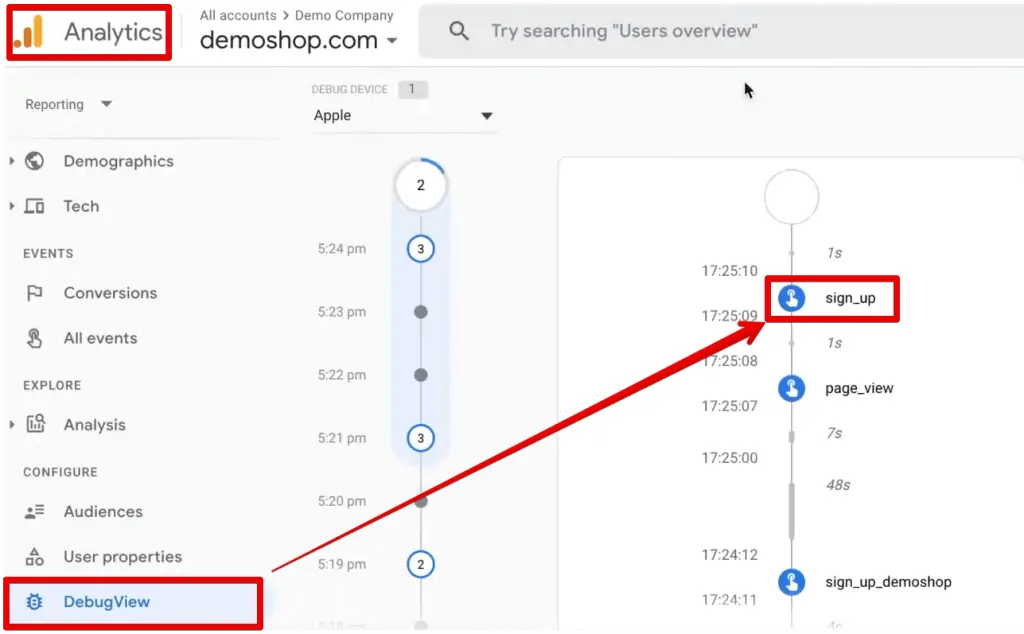
If you take a closer look into the Parameters of the event, you can find that the method has a value of form.
Having the trigger fired, you can see that this event could be a scroll, a click, the visibility of an element, or anything you want to track. Thus, the possibilities for Google Tag Manager working for you are innumerable.
Bringing this to an end, you can head over to the All Events page and find the sign-up event and mark it as a conversion.
Now, let’s go to the last method of setting up GA4 conversion tracking – on eCommerce websites.